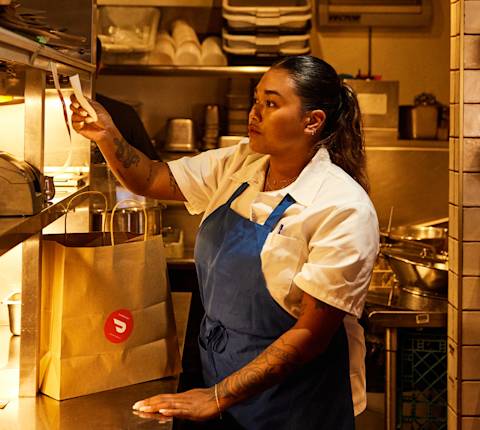
Without the right business hours, your customers won’t know when they can order from you.Setting up your store essentials on the DoorDash Portal is a critical step. By updating vital information and branding elements such as store hours, address, phone number, and header image, you lay the foundation for a thriving store. In fact, menus with header images and logos get up to 50% (header) and 23% (logo) more monthly sales than menus without these branding elements and can also qualify for DoorDash’s Most Loved program.
How to Find Your Store ID
Your unique Store ID is essential as it helps our support team identify your store so we can assist you with your queries efficiently.
To identify your store ID:
1. Log in to the Merchant Portal or navigate to your store link on the DoorDash website.
2. In the URL, you'll find a series of digits which is your Store ID as shown below:

How to find your store status
Your Store Status in the DoorDash Portal allows you to quickly check if your store is operational and accepting orders.
1. In the Merchant Portal, navigate to the Store Availability Tab in the left-hand menu bar.

2. Once there, you will see one of the 5 store status types:
Open: Store is open and receiving orders
Paused: Store is paused during Store Open Hours and not receiving orders
Closed: Not receiving orders
Inactive: Store activation steps have not been completed or not receiving orders, or has been marked as permanently inactive
Deactivated: Store was activated but is now inactive and is not receiving orders (various root causes of Deactivation exist, including the Store has been inactive for a long period of time, or a Dasher reported the Store as Closed)
How to update your store settings in the DoorDash Portal
Address
1. In the Merchant Portal, click on Settings and scroll down to Store Settings. There, you can find the edit address field:
2. Click on the Edit button next to “Address” to edit information.
3. In the address section, start typing in your address and select one of the drop-down addresses and click Save.

Restaurant phone number
1. In the Settings section of the Merchant Portal, you can find the edit phone number field in Store Settings.
2. Click on the Add or Edit button next to Phone Number to edit information.
3. Type in your restaurant phone number and Save.

4. Before saving, make sure you select the correct country code for your phone number (for example, +1 for the US).
Email Preferences
1. In the Merchant Portal, navigate to Account Settings.
2. Once you’re in the Email Preferences section, click on the slider bar to indicate whether you want to receive the daily/weekly store performance reports.

How to add or edit your logo and header image on the DoorDash Portal
Adding your logo and header image to your profile is a crucial store essential to market your restaurant online, as well as a requirement to access the Most Loved program. Keep in mind, only users with Business Admin permissions or higher will be able to update headers and logos. Learn more on how to manage permissions.
1. In the Merchant Portal, navigate to the Store Settings and scroll down to Store Logo and Header.
2. Click on + blue circle on the logo or header. If you ever want to edit these images, you can click here as well.
3. Drag and drop your desired image or click on Select File to navigate to the image stored on your personal device. Before clicking Add, make sure to click View Logo/Header Guidelines to ensure your image will be approved.
4. Once you’ve selected your image, you can zoom in and out by dragging the blue circle under the image. If in the future you want to change this image, click Change Logo/Change Header.
5. Click Submit for Review. If the image is approved, you’ll be able to see a preview. If not instantly approved, click OK and our team will review your image to make sure it meets DoorDash photo guidelines (~2-3 days).
How to manage store hours and special hours
Store hours
1. In the Merchant Portal, navigate to the Store Availability tab.
2. Select Edit on Regular Menu Hours on the left of the page.

3. Set your desired regular scheduled store hours and closures:
Add additional store hours using the blue plus sign button.
To close your store on a specific day, tick the Closed box in that section.
To adjust the daily hours your store works, select a time from the drop-down menus specific to each day.

Note: In order to prevent last-minute orders when you’re about to close for the day, DoorDash starts restricting deliveries 20 minutes before closing time to give stores adequate time to prep the final orders. However, for select stores, we have customized this buffer time based on your specific store’s metrics. If you’ve noticed that is the case for your restaurant, navigate to the Store Availability tab to learn more and opt out if desired.
Special store hours
1. In the Merchant Portal, navigate to the Store Availability tab.
2. Navigate to the bottom right section titled Special Hours and Closures.
3. Click Add New to add a new special closure or modify specialty hours.

4. Schedule your upcoming special hours and closures by selecting one of the available options.

5. If you want to customize special hours and closures, select the date range for specialty hours or mark it as closed all day, and hit Save.

How do I edit my store hours in my Point-of-Sale (POS) system?
Head to How to Manage Your Menu and Store Hours for Your DoorDash Integration to learn more about editing your store hours with your POS partner.
Set Your Delivery Cutoff Time
How does DoorDash determine my delivery cut off time?
To ensure you have enough time to prep orders before closing, DoorDash uses your store’s performance metrics to calculate the optimal order cutoff time (also known as last order time).
To calculate your optimal cutoff time we use metrics such as Dasher availability in your area, prep times, and your store’s performance metrics near closing time (such as missing and incorrect items and order cancellation rate). This helps maximize potential sales while helping to ensure you and your team are able to fulfill and deliver all orders prior to closing.
What if I want to change the delivery cutoff time?
If you find that the calculated optimal order cutoff time is not working for your store, you are able to change your cutoff time to a standard 20 minutes before closing. To do so:
Navigate to the Store Availability tab of the Merchant Portal or on the Business Manager App.
Click the toggle under Manage Hours to turn off the automatically adjusted last order times.
Want to learn how to set up your menu next? Learn how to set up your menu.